

How to Maintain a Honda GX630, GX660, and GX690 Engine: 5 Essential Maintenance Tasks

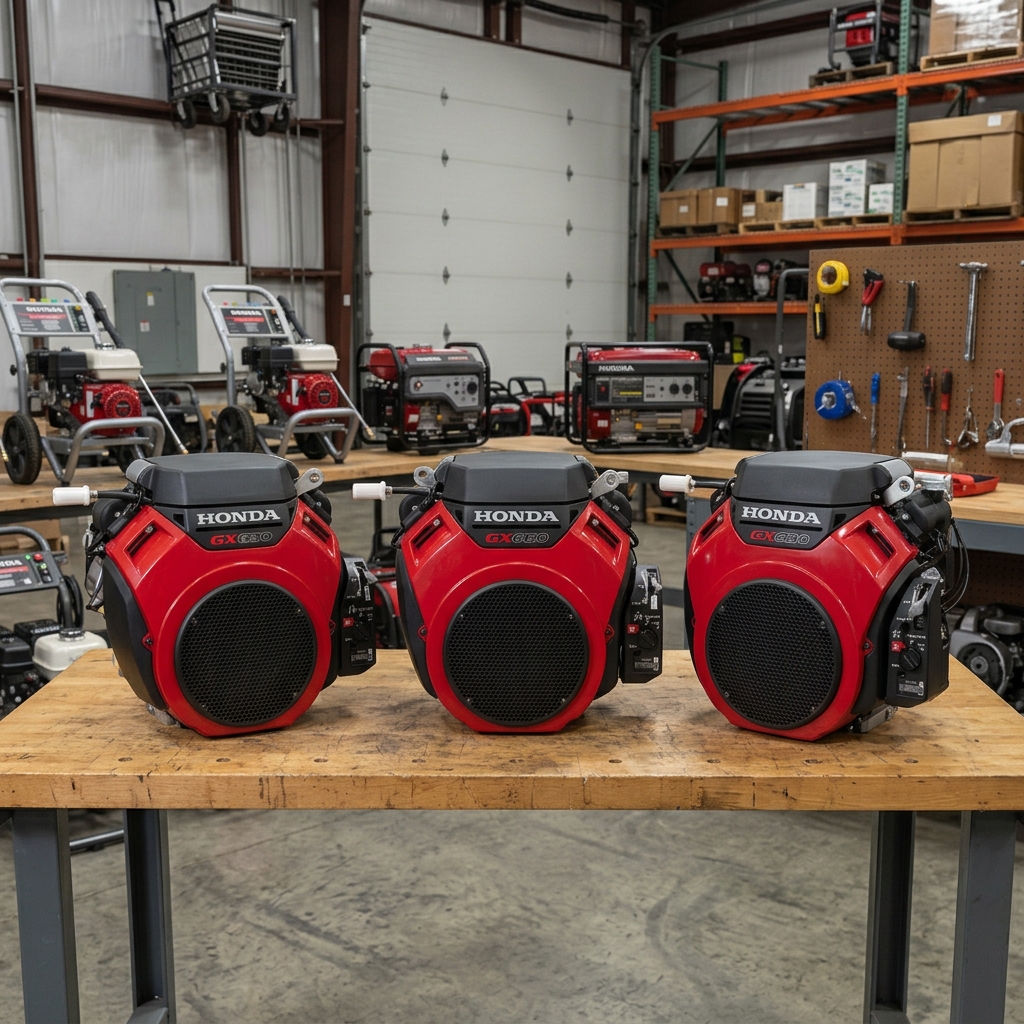
Regular maintenance is one of the best ways to keep your Honda GX630, GX660, or GX690 engine running reliably and reduce the risk of unexpected downtime. The five essential maintenance tasks covered in this guide are changing the engine oil, replacing the oil filter, maintaining the air cleaner, replacing the fuel filter, and checking or replacing the spark plug.
Important: Always turn off the engine, allow it to cool, and follow the manufacturer’s safety instructions before performing maintenance.
Table of Contents
- Changing Engine Oil
- Replacing Oil Filter
- Maintaining Air Cleaner
- Changing Spark Plug
- Replacing Fuel Filter
- Save on Honda GX630, GX660 & GX690 Maintenance Parts
1. Change the Engine Oil Regularly
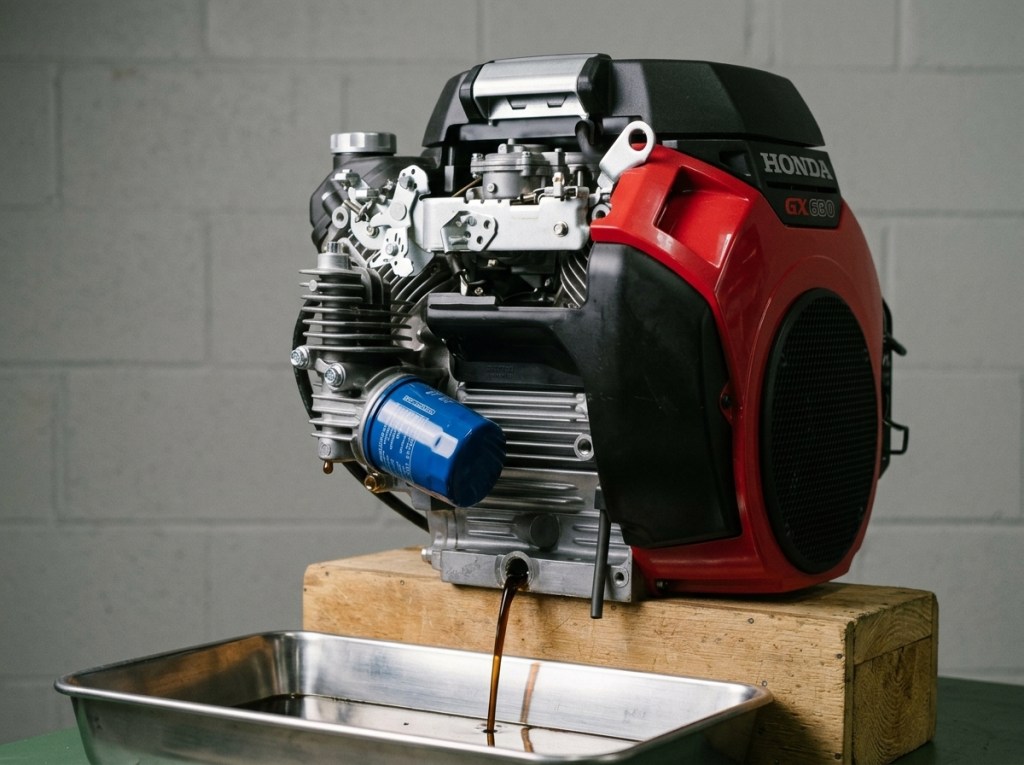
Engine oil lubricates the internal components of your Honda GX630, GX660, or GX690 engine. Over time, oil becomes contaminated and loses its ability to protect critical engine parts effectively.
Parts Information
- Part No.: 25 357 64-SP
- Part Name: ENGINE OIL 10W30 SY
Best Time to Change Engine Oil
- Initial oil change: After the first month or 20 hours of operation
- Regular oil change: Every 6 months or 100 hours
- Check oil level: Before each use
Checking the oil level regularly is especially important for equipment used in demanding commercial or construction environments.
How to Change the Engine Oil
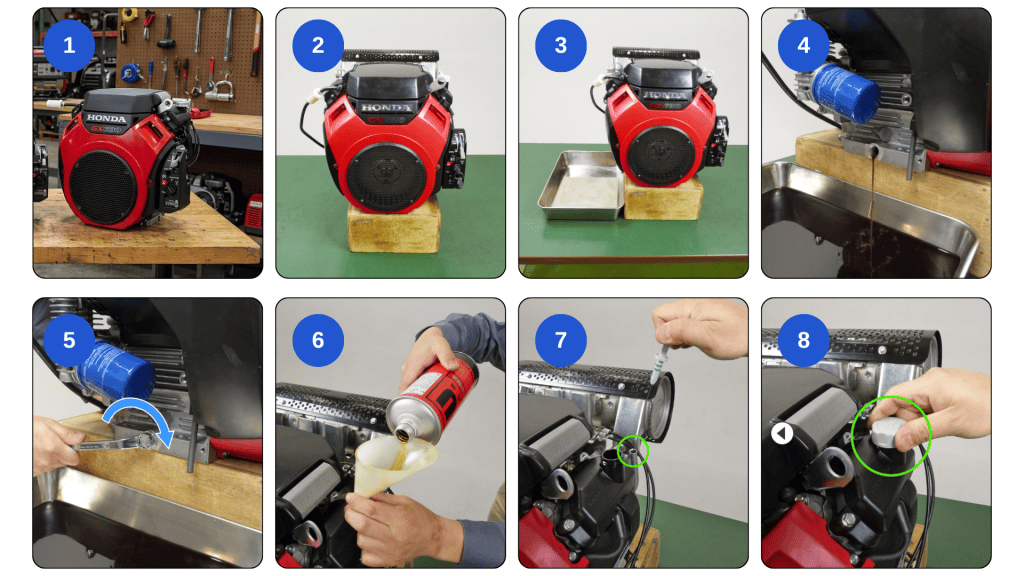
- Run the engine briefly to warm the oil, then turn it off.
- Place the equipment on a level surface.
- Position a suitable container underneath the engine oil drain.
- Remove the drain plug and allow the old oil to drain completely.
- Reinstall and secure the drain plug.
- Add the recommended engine oil slowly.
- Check the oil level using the dipstick.
- Avoid overfilling and securely reinstall the oil cap.
Dispose of used engine oil according to local regulations.
2. Replace the Oil Filter
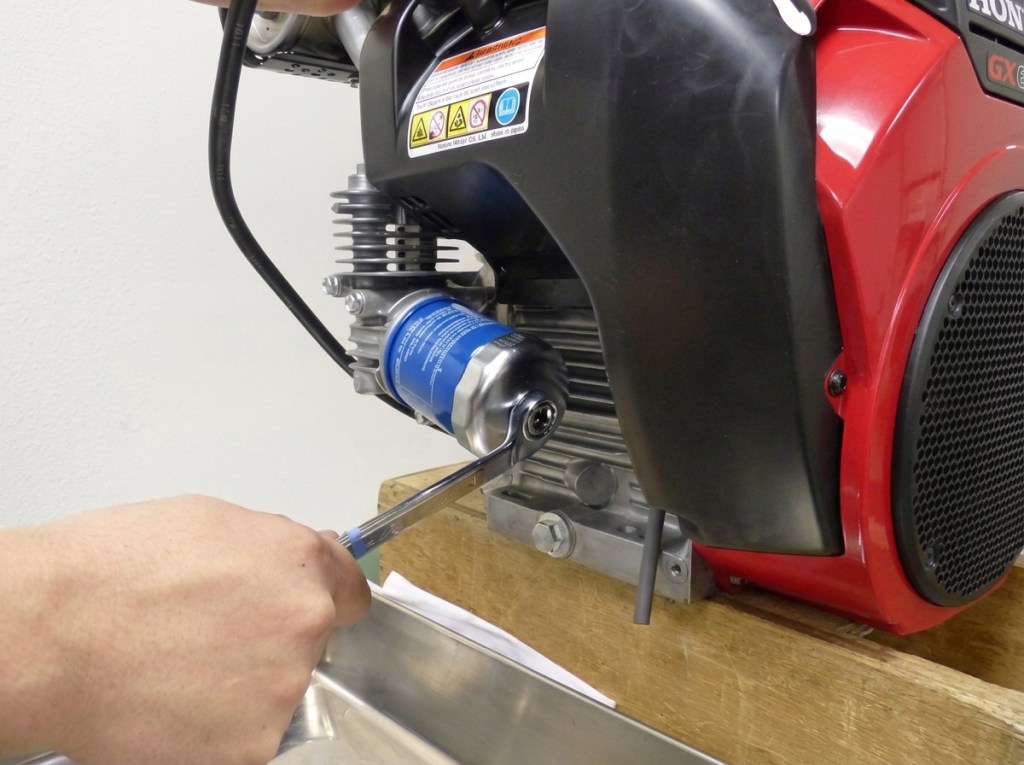
The oil filter helps remove contaminants from the engine oil before they circulate through critical engine components. A dirty or restricted filter can reduce the effectiveness of your engine’s lubrication system.
Parts Information
- Part No.: 15400-PLM-A02PE
- Part Name: OIL FILTER
Best Time to Replace the Oil Filter
- Replacement interval: Every 200 hours of operation
Replacing the oil filter at the recommended interval helps ensure cleaner oil continues circulating through the engine.
How to Replace the Oil Filter

- Turn off the engine and allow it to cool.
- Drain the engine oil if you are replacing the oil and filter together.
- Place a container underneath the oil filter area.
- Remove the old oil filter using the appropriate filter tool and drain the oil from the oil filter.
- Clean the filter mounting surface.
- Install the new oil filter according to the manufacturer’s instructions.
- Refill the engine with the recommended oil.
- Start the engine briefly and check for oil leaks.
- Turn off the engine and recheck the oil level.
Always make sure the replacement filter is properly installed before operating the equipment.
3. Inspect and Replace the Air Cleaner
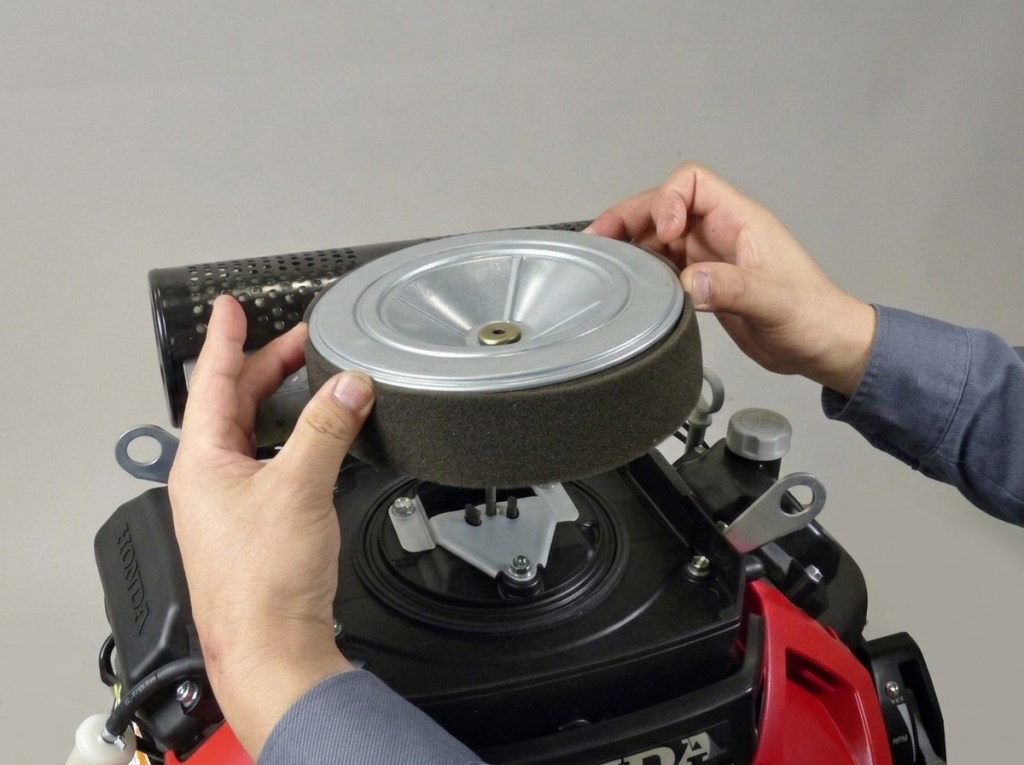
The air cleaner prevents dirt, dust, and other contaminants from entering the engine. This is particularly important for construction, landscaping, and industrial equipment operating in dusty environments.
Parts Information
- Part No.: 17210-Z6L-010
- Part Name: AIR CLEANER ELEMENT
Best Time to Maintain the Air Cleaner
- Inspect/Clean: Every 6 months or 100 hours
- More frequent maintenance: When operating in dusty conditions
- Replace paper element: Every 2 years or 500 hours
- Check: Before each use
A clogged air filter can restrict airflow and negatively affect engine performance.
How to Inspect or Replace the Air Cleaner

- Turn off the engine and allow it to cool.
- Locate and open the air cleaner cover.
- Unscrew the butterfly nut and carefully remove the air filter element.
- Inspect the element for excessive dirt, damage, or contamination.
- Clean the surrounding air cleaner housing using clean rag.
- Replace the filter if it is damaged or has reached its replacement interval.
- Install the air cleaner element correctly.
- Secure the cover before starting the engine.
Avoid operating the engine without a properly installed air cleaner.
4. Check and Replace the Spark Plug

The spark plug is responsible for igniting the fuel-air mixture inside the engine. A worn or contaminated spark plug can contribute to difficult starting, rough operation, and reduced performance.
Parts Information
- Part No.: 9807-5587G
- Part Name: SPARK PLUG
Best Time to Maintain the Spark Plug
- Check/Clean: Every 6 months or 100 hours
- Replace: Every year or 300 hours
Regular inspection can help identify carbon buildup, wear, or other issues before they affect engine performance.
How to Check or Replace the Spark Plug

- Turn off the engine and allow it to cool completely.
- Disconnect the spark plug cap.
- Remove the spark plug using the appropriate spark plug wrench.
- Inspect the plug for wear, deposits, or damage. The spark plug gap should be 0.7 – 0.8 mm [1] without carbon fouled [3] or wet fouled [4]
- Clean or replace the spark plug as needed.
- Install the spark plug carefully to avoid damaging the threads.
- Reconnect the spark plug cap securely.
Always use the correct replacement spark plug specified for your engine.
5. Replace the Fuel Filter

The fuel filter helps prevent contaminants from reaching the engine’s fuel system. Over time, dirt and debris can accumulate in the filter and potentially restrict fuel flow.
Parts Information
- Part No.: 16910-Z6L-003
- Part Name: FILTER, FUEL
Best Time to Replace the Fuel Filter
- Replacement interval: Every year or 300 hours
Because the fuel system requires careful handling, fuel filter replacement is often recommended for an experienced small engine mechanic.
How to Replace the Fuel Filter

- Turn off the engine and allow it to cool.
- Work in a well-ventilated area away from sparks or open flames.
- Follow the manufacturer’s instructions for accessing the fuel filter.
- Carefully disconnect the necessary fuel lines.
- Remove the old fuel filter.
- Install the new filter in the correct orientation.
- Reconnect and secure the fuel lines.
- Check carefully for fuel leaks before operating the engine.
- Start the engine and confirm proper operation.
If you are unsure about working with the fuel system, professional service is recommended.
Honda GX630, GX660, and GX690 Maintenance Schedule at a Glance
| Maintenance Item | Part Number | Check/Clean | Replacement Interval |
|---|---|---|---|
| Engine Oil | 25 357 64-SP | Before each use | First month/20 hours, then every 6 months/100 hours |
| Oil Filter | 15400-PLM-A02PE | Inspect during service | Every 200 hours |
| Air Cleaner | 17210-Z6L-010 | Every 6 months/100 hours | Every 2 years/500 hours |
| Spark Plug | 9807-5587G | Every 6 months/100 hours | Every year/300 hours |
| Fuel Filter | 16910-Z6L-003 | During scheduled service | Every year/300 hours |
Save on Honda GX630, GX660 & GX690 Maintenance Parts

TexPro Equipment currently offers a discounted Honda GX maintenance parts kit that includes the five essential parts covered in this guide:
- Engine oil
- Oil filter
- Air cleaner
- Fuel filter
- Spark plug
For equipment owners, contractors, rental companies, and landscaping professionals across Dallas-Fort Worth and North Texas, this complete kit is a convenient way to save money and stay ahead of routine engine maintenance.
Maintain your Honda engine and save on the parts you need.

Leave a Reply